Creating the Colour and Bump Maps
OK. so now it is time to create the base colour map. First thing to do is save your PSD file, FILE>SAVE AS. Save the PSD file to anywhere on your system and name it appropriately. We want to save the PSD file, as this has all the layer information and if we want to go back and edit it, we can edit any layer we want at a later date.
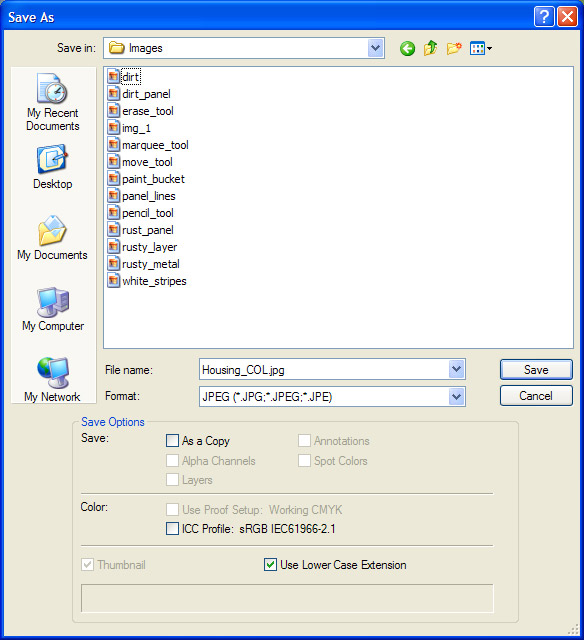
Now, turn on all layers, EXCEPT THE PANEL LINES LAYER. We do not want the panel lines showing up in the colour map, as we will be using them for a bump map later on. After you have this done, select LAYER>FLATTEN IMAGE. A window will pop up asking "Discard Hidden Layers?". Select yes and Photoshop will turn the layers into one. Do not worry about this, as we can pull up the PSD file again later. Now we need to save this image as our colour map. Select FILE>SAVE AS. A "Save File As" window will pop up:
Name the file whatever_COL and under the format drop down menu, save as either a JPEG or TGA image, (as Blender only recognizes these file types). Then press SAVE. Another window will pop up asking about quality settings. Leave this at default and press OK.
This is the base colour image:

Now to generate the required bump maps for this panel. You can either select EDIT>STEP BACK or opt to reload the base PSD file. Usually EDIT>STEP BACK brings you back to where you want to be, (you may need to so it 2-3 times to get back to having all your layers showing again). We will first generate the Panel Line bump map. So turn off all the layers, EXCEPT THE PANEL LINES LAYER. You should see nothing but the panel lines and a checkerboard background in your Photoshop windw, (the checkerboard is there meaning that the is no background fill layer). Now select LAYER>FLATTEN IMAGE and select YES to discard hidden layers again. You should now have the following:

Do the same as the colour map and do a FILE>SAVE AS and name this image Panel_Bump.
Now comes the somewhat tricky part. Generating the bump map for the rust and dirt.