 (Right click and "Save As" to download full size version, 1600 x 1200)
Adding the Grit & Grime
OK. So we now have our base image that we want to dirty up. For this, we will use a couple of high resolution image textures that are easily accessible from the web.
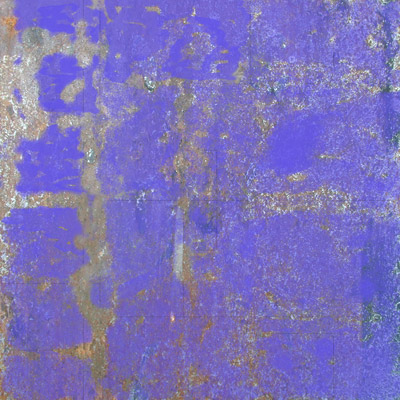
The first image is the rusty metal:
(Right click and "Save As" to download full size version, 1600 x 1200)
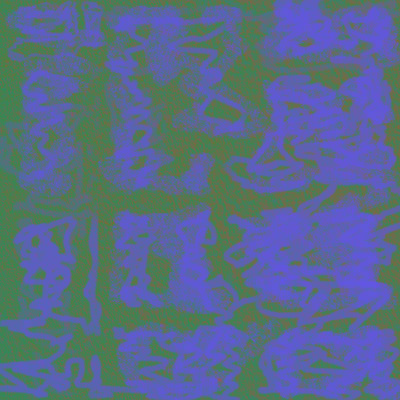
And the next is a sort of dirt like image. (Not really dirt, but it will look like it when we are done):
 (Right click
and "Save As" to download full size version, 1600 x 1200)
(Right click
and "Save As" to download full size version, 1600 x 1200)
Texture images courtesy of Mayang's Free Textures
We need to first adjust the size of these above images to correspond to the 2400 x 2400 resolution of our image that we are working on. So open the rusty metal image and go to IMAGE>IMAGE SIZE. A window will open and enter the new width and height at 2400 x 2400 respectively. NOTE: Very important to unclick the Constrain Proportion s option here, as this will just scale the image and not resize it properly. Now with both the Width and Height set to 2400 pixels, press OK. The image will be resized. Now do the same thing for the dirt image, making sure that you deselect the Constrain Proportion option as well.
Now, with the Move Tool
 , grab the
rusty metal image a drag and drop it into the PSD file with the base
colour/stripes/panel lines. By doing this, this will automatically make a new
layer for this image. Still using the move tool, move the rusty metal image
around until it is completely filling the screen andthere are no gaps around any
of the outside edges, (i.e. you can't see the base colour image below).
Photoshop should snap the image into place once you have it close to the edges
anyway, so you shouldn't have a problem here. Now do the same with the dirt
image and place it so it fills the screen.
, grab the
rusty metal image a drag and drop it into the PSD file with the base
colour/stripes/panel lines. By doing this, this will automatically make a new
layer for this image. Still using the move tool, move the rusty metal image
around until it is completely filling the screen andthere are no gaps around any
of the outside edges, (i.e. you can't see the base colour image below).
Photoshop should snap the image into place once you have it close to the edges
anyway, so you shouldn't have a problem here. Now do the same with the dirt
image and place it so it fills the screen.
Make sure that you have the dirt image layer on top of the rust image layer, (you don't see dirt underneath rust now, do you? :)).
OK, now to make things rusted up and dirty. First we will make things rusty.
So select the layer with the rusty metal image on it by pressing the layer:
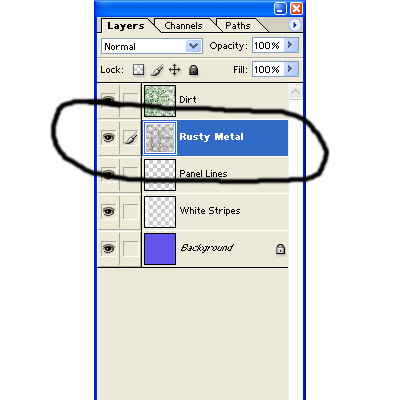
Now, hide the remaining layers, EXCEPT THE PANEL LINES LAYER, by pressing the "Eyes" beside each corresponding layer. Now on the rusty metal layer, click on the opacity and drop the slider down to about 30-40%. You should now be able to see the panel lines beneath the rusty metal image. We will now use the panel lines as a guide for painting the rust.
Make sure you still have the Rusty Metal layer selected and then select the
Erase Tool 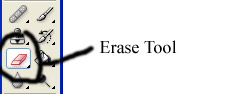
Now select a brush from the brush menu, (it is best to use non-uniform type brushes for this process), and increase the pixel size to something in around the 25-40 range. Also, and this is very important, set the opacity of the brush to less than 100. This will ensure that there is some residual stuff left over. Now start erasing parts of the rusty metal image making sure to leave rust in areas that you would expect to see rust, (i.e. in the panel cracks, and just around the panel edges), but also leave some residual rust in the middle of the panels. I also went around and blurred some of the edges to soften of some spots that seemed to uniform or sharp.
I did this process about 4 times with different brushes and different opacities on the brushes for each pass. This was my result:
Now hide the Rusty Metal layer and turn on the Dirt layer. Repeat the above process but you do not need to follow the panel lines on this layer, as dirt has a way of just going all over the place. Also use an array of different brush types and brush opacities to get the desired effect that you want. For the dirt layer, I also did some smudging in areas and also some blurring to soften out some spots.
For this dirt layer, you can see that the dirt is not really a dirt colour, (i.e. browny). We can fix this by changing the blending option on the layer to Colour, instead of the basic Normal. Go to the pull down menu that says normal at the top of the Layers panel and select Colour. This will change the colour to a more browny/mucky look. This is the result of this process, showing the Dirt layer only:
We are now done with this process and we can move on to generating the base colour map, and the subsequent bump maps.